Spring is in the Air!!!
With the holidays behind us and spring in the air it's time to get back into the garden a new. The heavy rains of late have been giving the garden a new lease of life and the seedling box was over flowing. We replanted them into the top tier garden and fenced it off for their own growth protection from visiting animals and added more seedlings to the box. Less than a week and there is growth.
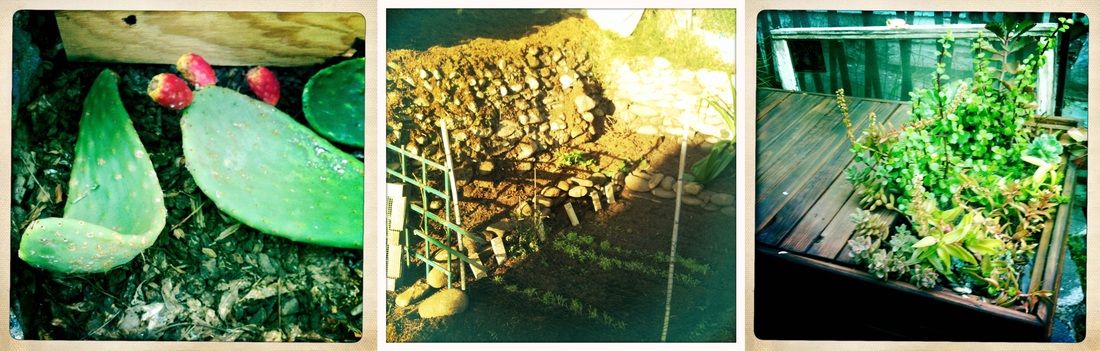
We were given (by Landscape Gardner Zoe Logan) about 13 Opuntia Nopales (Prickly Pear Pads) which we have planted up right about 1 inch deep into the soil. Each planted in a different spot around the garden where they will get maximum sunlight. As they grow in a straight up right way we have them planted along the front gardens fence creating a small hedge. Both the pads and the fruit can be eaten you can find some simple recipes at http://www.wikihow.com/How-to-Eat-Prickly-Pear-Cactus
Just for fun .....facts about Opuntia (Prickly Pear):
1- It's the State Plant of Texas since 1995.
2- The Coat of Arms of Mexico has an golden eagle perched on top of the Opuntia.
3- The Fruit is sometimes sold under the name "Tuna" or "Fig" fruit.
4- The gel-like sap of prickly pears can be used as hair conditioner
5- Mexican natives have made "colonche" an alcoholic drink from the fruit for thousands of years.
6- Opuntia contains a range of alkaloids and is used in medicine including helping with type 2 diabetes and reducing the effect of hangovers.
7- The Cochineal insect lives off the Opuntia and is used to make the dye colour red. By the seventeen century the dyestuff was so highly prized throughout Europe that it was on the London and Amsterdam Commodity Exchanges. No one really knew how the dye was made and Spain holding the worlds monopoly kept it's secret hinden away in the Americas. Spain had come by the process of making the red dyestuff during the Spanish conquest of the Aztec Empire. In 1777 the French sent a spy to Oaxaca, Mexico the main area of production to find out this great and lucrative secret. French botanist Nicolas-Joseph Thiery de Menonville smuggled the insects and pads out of the country. The world was shocked to discover that red dyestuff came from crushing a tiny insect that only live on cactus.
The word Cactus comes from the Greek Word " Kaktos" which means Prickly Plant and after getting serval spines in my fingers even through my garden gloves I totally get the name. The Prickly Pear also has a beautiful flower which we look forward to seeing blown along the hedge.
We were also given a few Blue Aloe Vera Plants to accent the garden with and may have some baby Lowquat trees coming our way soon....
Prickly Pears and New Seedlings .....
A Day of Cleaning Up!

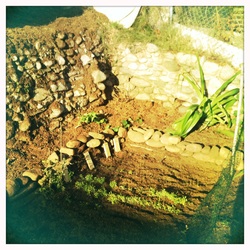
Big THANK YOU to those who got Down and Dirty by coming to help move our delivery of soil and fertilizer, kindly procured by our own Christine Spehar. It was a big job but well worth the effort. This weekend we manage to tidy up the newly created areas and have a nice new bed ready for planting in the front entrance. The HOLE in the back top tier has been completed thanks to Charter and Dan Johnson who finished carrying out the last of the rocks before filling it with fresh soil, fertilizer and worm tea to get it ready for planting.
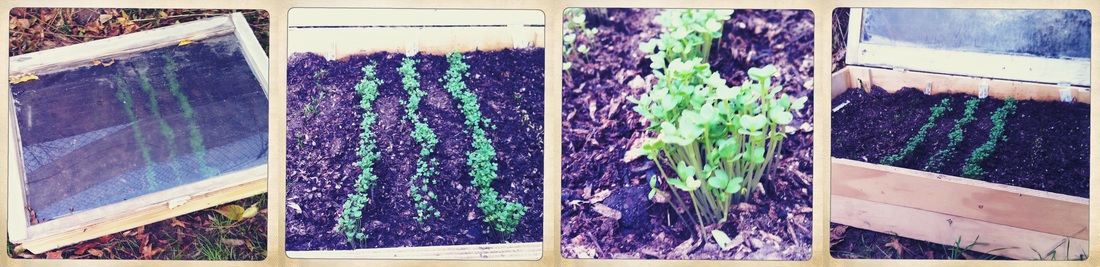
The seedling box is working well with lots of new growth to be had. Planted is Dil Mammoth, Spinach, Mustard India (Florida Board Leaf) and Swiss Chard. The Mustard India has gone crazy, though will make good coverage for the garden once replanted.
The seedling box is working well with lots of new growth to be had. Planted is Dil Mammoth, Spinach, Mustard India (Florida Board Leaf) and Swiss Chard. The Mustard India has gone crazy, though will make good coverage for the garden once replanted.

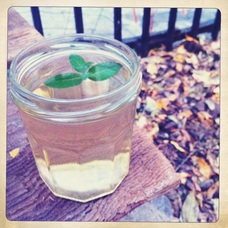
Mint Tea!
Discovered in the front yard was a small bush of Mint growing quitely by the a beautiful Rose, so after a hard day of working we made fresh mint tea with a drop of local flower honey from the Highland Park Framer Market. A perfect way to end the day.
The Girls Arrived!
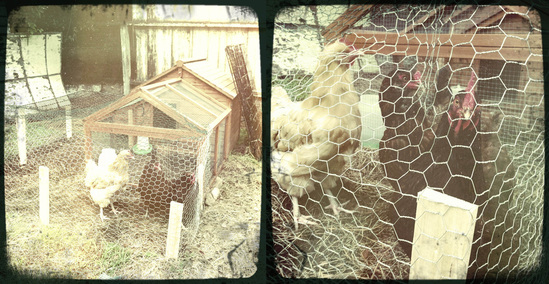
Just before Thanksgiving weekend Kristin added three beautiful hens to AntFarm Arces Community Garden. They came from a loving home that just couldn't keep them anymore so we offered to take them. They arrived with a stylish chicken coup that was just a little small for our liking so we are in the process of building them something a little more Manor style. Once they are fully settled in and we have the Garden securely fenced they will be roaming free during the day. The sound of happy clucking is just beautiful to hear while working in the garden and hopefully with some loving they may give us plenty of fresh eggs. http://www.chickenkeepingsecrets.com/chicken-keeping-secrets/
Mum's Advice! ~ Sent from New Zealand: Looking after your Chickens: Make sure they have fresh water all the time a warm, rain proof & wind free house to live in. Clean out their house regularly using good straw in their nesting boxes. Feed them on mixed grain and layers pellets also organic scraps from house, watch for rats so keep food in sealed containers if stored outside. Let them out each day at 3pm for 2 hours or so, watch out they love your garden to scratch in and can make a mess of it so keep an eye on them. Plant Borage (Star Flower) and Silver Beet (Swiss Chard) around outside of their hen house they love it and it keeps them healthy. Borage flowers look lovely frozen in ice cubes for Summer drinks. On a side note feed them a slice of dog food roll every so often its good protein for them my chooks love it, they pinch the dog and cat biscuits much to the annoyance of Totty, Poppet and Tigger.
Mum's Advice! ~ Sent from New Zealand: Looking after your Chickens: Make sure they have fresh water all the time a warm, rain proof & wind free house to live in. Clean out their house regularly using good straw in their nesting boxes. Feed them on mixed grain and layers pellets also organic scraps from house, watch for rats so keep food in sealed containers if stored outside. Let them out each day at 3pm for 2 hours or so, watch out they love your garden to scratch in and can make a mess of it so keep an eye on them. Plant Borage (Star Flower) and Silver Beet (Swiss Chard) around outside of their hen house they love it and it keeps them healthy. Borage flowers look lovely frozen in ice cubes for Summer drinks. On a side note feed them a slice of dog food roll every so often its good protein for them my chooks love it, they pinch the dog and cat biscuits much to the annoyance of Totty, Poppet and Tigger.
Making Worm Pee Fertilizer !
Worm Tea (or Worm Pee Fertilizer as I like to call it) is collected by the spraying of the worm pits. How Carter explained the collection process to me: There are three levels to the worm pee collector, worm pit or as it's best known a Worm Farm. From bottom to the top: 1. The Basement Sewer (where the worm pee collects), 2. The Middle Floor where the worms and their pooh sleep and 3. The Top Floor where their food is placed.
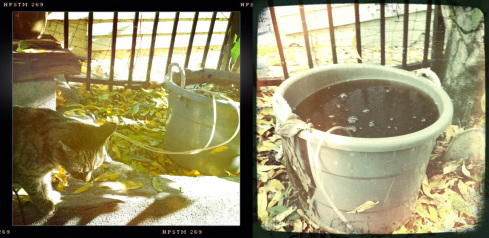
The worm urine as well as the other nutrients are combined and recycled. The end result is a liquid plant and soil enhancer that can be diluted to a 1 part Worm Tea to 50 parts Water. (1-50 ratio). We put ours under the pear tree in a large bucket. In side the bucket we put a small fish tank air pump and gave it some loving stirring and let it bubble for a day before placing it around the garden. This can be used as a fertilizer as well as insecticide. This website has more infomation on the benefits of Worm Tea: http://www.villagegreenperennialnursery.com/worm-tea.shtml
On looking into earth worms and their benefits I found out some fun facts:
Did you know that the common earth worm has many folk names such as "Dew-Worm", "Rainworm", "Night Crawler" and "Angleworm" the last one due to it's use on the end of a fisherman's hook.
Ever seen a chunky ring going around a earthworm well that is a cocoon which forms after mating. Eventually the worm backs out of the ring and in the process of doing so injects it's own eggs and the other worm's sperm into it. As the worm slips out of the ring, the ends of the cocoon seal to form a vaguely lemon-shaped incubator (cocoon) in which the embryonic worms develop. They merge as perfect shaped little earthworms but don't make up their mind as to weather they are a boy or girl for 60 to 90 days. Within a year they are full size and have an average lifespan of 4 -8 years. Earthworms have the ability to regenerate lost segments and provide huge benefits to the soil both biologically, chemically and physically.
Well there's a lot more to the average earthworm than we thought, so next time you decide to put one on your fishing hook remember how important they are.
How to build a Seedling Box from a Window Frame!
Mark Rice gave us several packets of seeds, which we have been dying to get into the soil. Recently I went and brought a big bag of potting soil then picked up my supplies from Robins and started building a seedling box.
All you need to make one is:
- An old window frame with glass pane in it (tidy it up just enough to make it safe).
- 2 small hinges.
- Some planks of wood that can be cut to the height and length of the window pane.
- Some off cuts to use as brackets for the sides if required.
- Nails and Screwdriver
- 1 amazing assistant to help you hold everything together as you work. I was lucky enough to have David Dayan Fisher help me.
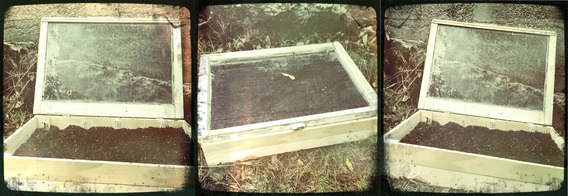
Measure the sides of the box and cut the wood to size, our window is about 28" x 16" , a good height for the box is about 8" or 9".
Screw the sides together then lay the window frame on it and hinge the back so it can be lifted up easily. Unless you wish to move the box around you don't have to build a bottom for the box. We found a area in the garden to be the seedling nursery and placed the box there. We then filled it with soil and started planting the seeds. We watered them, feed them some worm tea and then putt the window frame down to close them up for the night. It works like a mini greenhouse and when they get bigger you can prop open the window frame so they can grow free before transplanting them.
All you need to make one is:
- An old window frame with glass pane in it (tidy it up just enough to make it safe).
- 2 small hinges.
- Some planks of wood that can be cut to the height and length of the window pane.
- Some off cuts to use as brackets for the sides if required.
- Nails and Screwdriver
- 1 amazing assistant to help you hold everything together as you work. I was lucky enough to have David Dayan Fisher help me.
Measure the sides of the box and cut the wood to size, our window is about 28" x 16" , a good height for the box is about 8" or 9".
Screw the sides together then lay the window frame on it and hinge the back so it can be lifted up easily. Unless you wish to move the box around you don't have to build a bottom for the box. We found a area in the garden to be the seedling nursery and placed the box there. We then filled it with soil and started planting the seeds. We watered them, feed them some worm tea and then putt the window frame down to close them up for the night. It works like a mini greenhouse and when they get bigger you can prop open the window frame so they can grow free before transplanting them.
The Hole and Rock Sifting!
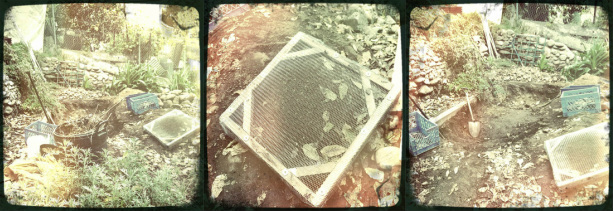
Carter and Rosie have been busy soil sifting. We had the soil tested in both the upper level and lower level of the garden. Once the results came back we started planing. Carter started with the top tier garden and discovered that most of the way down it was large rocks so he has been sifting rocks out of the soil and working on creating a great area to start growing in.
After the Wild Winds....
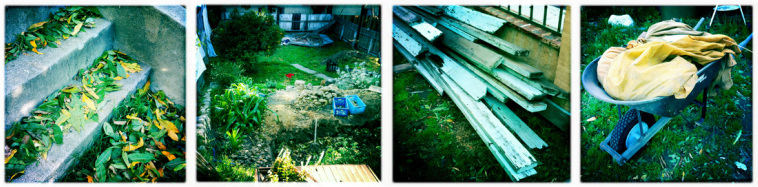
The garden is covered in leaves but still in one piece after the wild winds descended on LA. We had a delivery recently of recycled wood which is stacked in the front yard ready to be used for our new beds and other projects. The wheelbarrow is full from the clean up, lets hope this weekend is sunny and wind free to get busy in the garden.

The Naked Peach Tree!
